|
June 12, 2008 Build an inexpensive wired Ethernet-to-Serial interface. Let's face it, you don't always need a wireless Bluetooth interface for your radio. USB-to-Serial converters offer inexpensive serial port connections to newer computers, but they can be problematic. Wouldn't it be nice to connect your radio to your shack's LAN, or better yet, to the Internet? CTR-Server offers one Ethernet-to-Serial solution. The drawback with this program is that your PC must be running for it work. What's needed is a stand-alone Ethernet-to-Serial server that can connect your router directly to your radio without a computer in the middle. A quick Google search reveals that there are several ready to use serial port servers on the market ranging from USD 89 to well over USD 200. But then what's the fun of buying a commercial device when for around USD 30 you can buy a WIZ110SR Ethernet-to-Serial board from SparkFun.com and build your own? Below is a pictorial of how I built mine (I actually have two of them, they are pretty handy to have around). NOTE: I am not in any way connected to sparkfun.com or www.wiznet.co.kr (the manufacturer of the WIZ110SR), or Hammond Manufacturing. I just think this is a way cool way to connect to my radio! You will need the following:
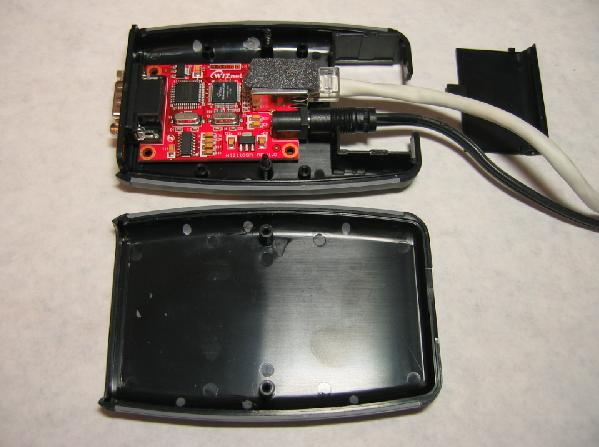
The WIZ110SR fits neatly
inside the component space in the Hammond box. A hole for the serial
port was cut in the end blank supplied with the box and the partition
between the component compartment and the battery compartment was cutout
to allow the Ethernet and power connections to enter through the battery
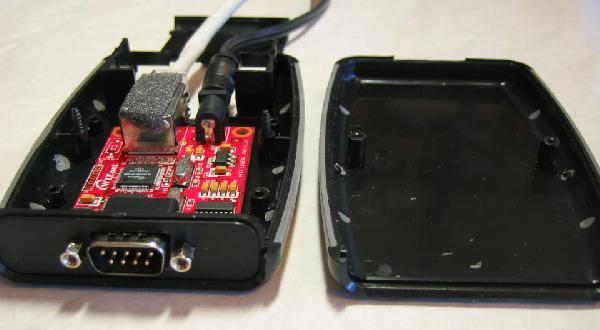
compartment. Here's the serial port
view. The two threaded studs attach the WIZ110SR's serial port to the
front panel, keeping it secure. The foam on the Ethernet connector
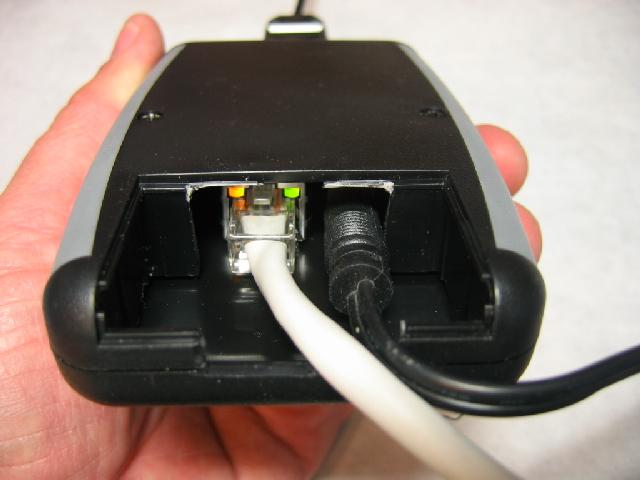
further cushions the board and keeps it from wobbling around in the box. The Ethernet and power
cables enter through the battery compartment. Here's a shot of the
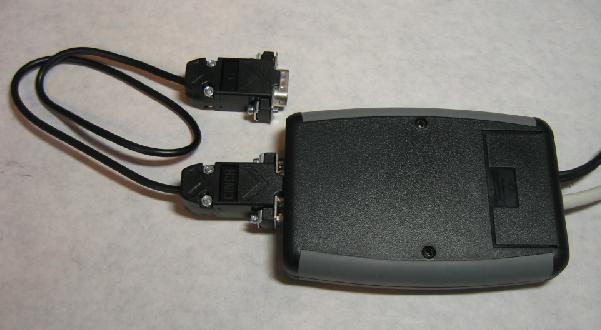
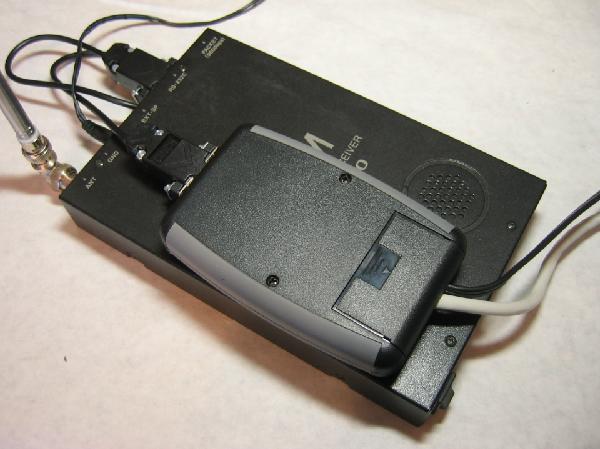
Ethernet/Power end showing the slot I cut to allow cable entry. Here's the completed
unit. I built a short serial cable for the PCR-1000 with pins 7 & 8
shorted on the DB9M (radio end) so the radio stays on when I disconnect.
Pins 2, 3, and 5 are connected straight through for the PCR-1000 (the
gateway looks like a PC serial port, i.e. DTE). Finally, here's completed
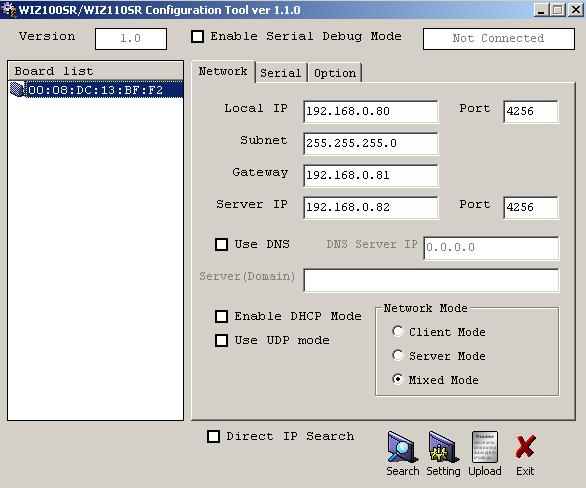
unit with the PCR-1000. This unit can be used with any radio that you can control with RS-232. For a Yaesu with the 8-pin miniDIN interface you'll need a CT-62 adapter, for Icoms with the C-IV interface you'll need a C-IV adapter, and for older Kenwood radios you'll need a IC-232 adapter. NOTE: It is highly recommended that you build a custom cable if you plan on using this (or any RS-232 port) with the Elecraft K2 radio because of non-standard power/voltage connections present on the K2's serial port. Refer to their documentation! Using the Ethernet-to-Serial Gateway One of the nice features of the WIZ110SR is that it can be fully configured via the Ethernet port. Through this port you can set it's TCP/IP address and change the serial port properties. Other Ethernet-to-Serial gateways require you to configure them through their serial port. You will use the supplied WIZ110SR Configuration Tool to configure the gateway. Power up the gateway with a 5 VDC power supply, connect it to your LAN and use the Search feature in the configuration tool to locate the gateway on your LAN.
Once you have this screen up you can edit the TCP/IP addresses, ports, and subnet for the Ethernet side. You'll connect to the Local IP address and Local IP Port when you connect using CTR software. The Gateway and Server IP addresses and port should be set if you plan on experimenting with them. Set the other setting as shown above. Next, click on the
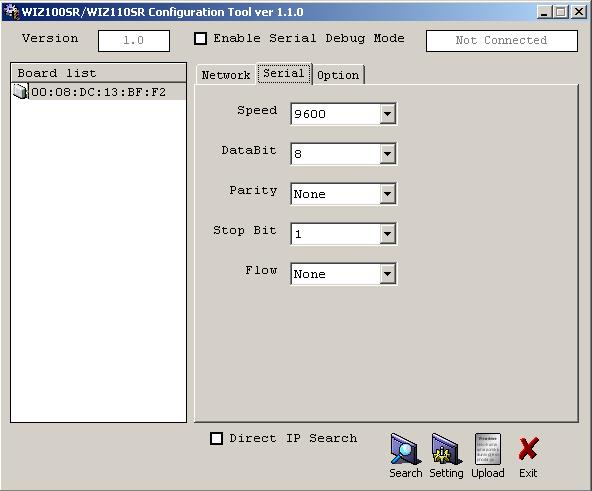
Serial tab to set the serial properties to match your radio. Finally, click on the
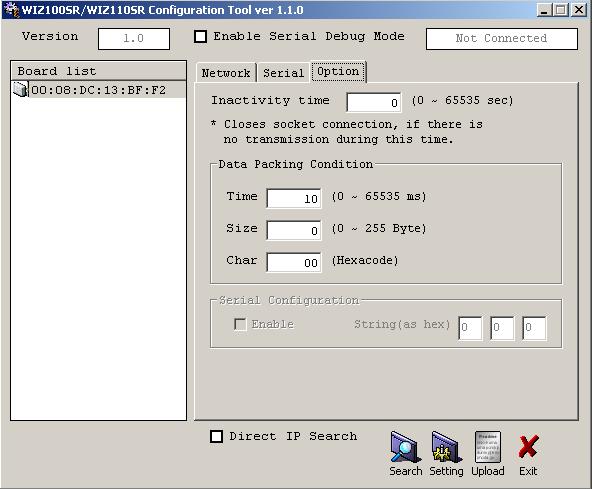
Option tab and enter the following settings. These allow the gateway
to operate with CTR software. You may need to adjust the Time
property if you find you have problems maintaining a reliable connection
over the Internet. These settings worked well on my LAN/Wifi network. CTR radio control software directly supports TCP/IP connections. Just enter the Local IP address you entered in the Network tab as the TCP/IP Host Address in the Comm menu and the Local IP Port number from the Network tab as the TCP/IP Host Port, again in the Comm menu. As with all aspects of ham radio, experiment a little, get your hands dirty a little, learn a little, and have FUN! Now, if I could only find a TCP/IP based stand-alone audio interface! 73, Lynn, KU7Q
|
|||||||